Disclaimer:
The topics and methods presented and explained in this article are intended for educational purposes only. They must not be used for illegal activities or without proper authorization. The responsibility for the ethical and legal application of the information provided lies solely with the user. Unauthorized or malicious use of these techniques may result in legal consequences.
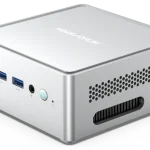
The RP2040 USB Board is a versatile and budget-friendly platform that’s perfect for building a Bad USB Stick. With its compact size, programmable features, and dual-core Arm Cortex-M0+ processor, it offers everything you need to simulate USB devices like keyboards and mice for security testing. Follow this RP2040 Bad USB Setup guide to create your own custom Bad USB device for cybersecurity experiments.
What is a Bad USB Stick?
A Bad USB Stick is a programmable USB device designed to perform automated tasks upon connection. These tasks can include:
- Emulating Keyboard Inputs: Automate commands for penetration testing or debugging.
- Testing System Vulnerabilities: Inject payloads to simulate potential threats.
- Security Tools: Execute scripts for ethical hacking and network assessments.
While this device is powerful, always ensure it is used responsibly and ethically.

Turn the Waveshare RP2040 USB-A Microcontroller into your ultimate Bad USB device! Perfect for security testing and payload automation in a compact form factor.
Step-by-Step Guide to RP2040 Bad USB Setup
Step 1: Prepare the Device
- Insert the RP2040 USB Board: Connect it to your computer via USB.
- Mount RPI-RP2: Hold the BOOT button while plugging in the device. It will appear as a storage device named RPI-RP2.
- Download CircuitPython Firmware: Visit CircuitPython Downloads and download the correct UF2 file. This one if for a Raspberry Pi Pico.
- Copy the Firmware: Drag and drop the UF2 file onto the root of the RPI-RP2 drive.
- Reboot: The board will restart and mount as CIRCUITPY on your system.
Step 2: Set Up PicoUSB
- Clone the PicoUSB Repository
git clone https://github.com/TomBrlek/PicoUSB.git
This downloads all necessary files for the setup. - Copy Files to CIRCUITPY: Navigate to the
./src/directory of the cloned repository and copy its contents to the CIRCUITPY drive.
Step 3: Configure Your Payload
- Set the Keyboard Layout:
- Open the
layout.txtfile on the CIRCUITPY drive. - Specify your keyboard layout (e.g.,
US,DE,FR).
- Open the
- Write Your Payload:
- Create a plain text file named
pico_usb.txt. - Add the commands or scripts you want to execute.
- Copy
pico_usb.txtto the CIRCUITPY drive.
- Create a plain text file named
Step 4: Finalize and Test
- Reboot Automatically: Once the files are copied, the device will reboot.
- Test the Device: Insert the RP2040 into a system (with permission). The Bad USB Stick will execute the payload immediately.
Reset or Update Your RP2040 Bad USB Stick
If you need to change the payload or reset the device (not needed for e.g. Waveshare RP2040-One):
- Enter Reset Mode:
- Hold the BOOT button while connecting the RP2040 to your computer.
- Mount as RPI-RP2: The device will appear as RPI-RP2.
- Flash Reset Firmware:
- Download the flash_nuke.uf2 file from Raspberry Pi Documentation.
- Copy the file to the RPI-RP2 drive. The device will reboot.
- Reconfigure the Device: Repeat the setup process to install a new payload.
Why Choose the RP2040 for a Bad USB Stick?
The RP2040 USB Development Board is a perfect fit for Bad USB projects due to its:
- Affordable Price: Cost-effective for experimentation.
- Compact Size: Ideal for discreet use.
- Programmable Features: Supports customizable payloads for advanced security tests.
Conclusion
The RP2040 USB Board offers an easy, affordable way to create a Bad USB Stick. This guide provides all the steps needed to set up and test your device, making it a great tool for penetration testers and cybersecurity enthusiasts. Use it ethically and responsibly for security testing purposes.